DUSt3R是新出的一款3D重建工具,能仅凭2张普通相机拍摄的照片完成3D 重建。
DUSt3R项目地址: https://github.com/naver/dust3r
下面教大家怎样在 debian12里面安装 DUSt3R 并且创建自己的3D图像。
硬件条件:一台有 NVIDIA 独显的电脑。
安装debian12的过程就不说了,大家应该都懂。
安装DUSt3R的过程需要下载好几GB的文件,有些文件在国外的服务器,为了加快下载速度,最好有这个东西(你懂的):

一、确认电脑里有显卡
lspci -nn | egrep -i "3d|display|vga"
二、安装所需的一些系统软件
apt install vim gcc g++ make python3-pip linux-headers-amd64 linux-headers-$(uname -r)

reboot
三、安装CUDA Toolkit,在这里找到适合你系统的版本 : https://developer.nvidia.com/cuda-downloads
wget https://developer.download.nvidia.com/compute/cuda/12.4.0/local_installers/cuda_12.4.0_550.54.14_linux.run

sh cuda_12.4.0_550.54.14_linux.run
四、安装Anaconda3,在这里找到适合你系统的版本: https://repo.anaconda.com/archive/
wget https://repo.anaconda.com/archive/Anaconda3-2024.02-1-Linux-x86_64.sh

sh Anaconda3-2024.02-1-Linux-x86_64.sh
五、安装 dust3r
git clone --recursive https://github.com/naver/dust3r
cd dust3r
conda create -n dust3r python=3.11 cmake=3.14.0
conda activate dust3r
conda install pytorch torchvision pytorch-cuda=12.1 -c pytorch -c nvidia
pip install -r requirements.txt
cd croco/models/curope/
python setup.py build_ext --inplace
cd ../../../
mkdir -p checkpoints/
wget https://download.europe.naverlabs.com/ComputerVision/DUSt3R/DUSt3R_ViTLarge_BaseDecoder_512_dpt.pth -P checkpoints/
六、运行
python3 demo.py --weights checkpoints/DUSt3R_ViTLarge_BaseDecoder_512_dpt.pth --local_network系统重启后再次运行:
eval "$(/root/anaconda3/bin/conda shell.bash hook)"
conda activate dust3r
python3 demo.py --weights checkpoints/DUSt3R_ViTLarge_BaseDecoder_512_dpt.pth --local_network
在浏览器打开 http://IP:7860 即可访问WEB端
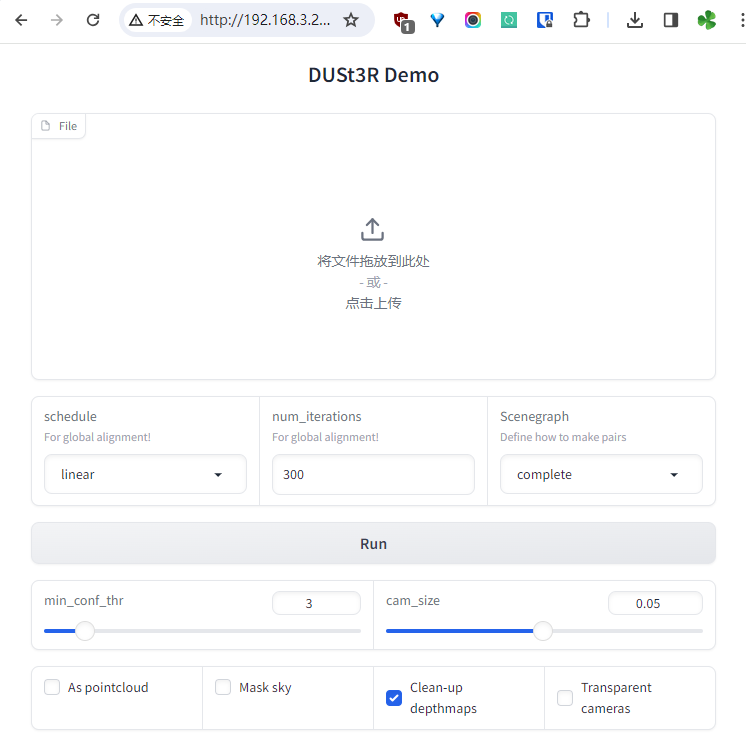
如果在运行的过程中提示显存不足 “torch.cuda.OutOfMemoryError: CUDA out of memory. Tried to allocate xxx GiB”,除了砸RMB换更好的显卡,还可以设置 device=’cpu’ 这个参数。 修改 dust3r目录里的 demo.py 文件,大概在136行左右,将原来的:
scene = global_aligner(output, device=device, mode=mode)改成:
scene = global_aligner(output, device='cpu', mode=mode)可以解决显卡内存不足的问题,但是副作用是会导致执行时间更长。
这是我自己用手机拍了12张照片构建出来的3D效果:
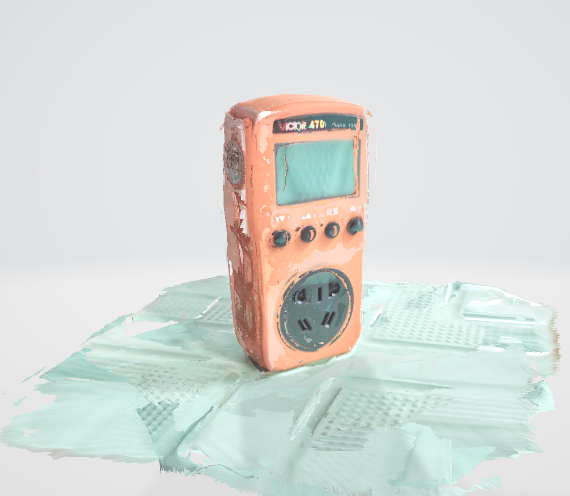
鉴于网页无法展示3D效果,大家还是自己部署然后生成一个试试吧。